NodeDR POS tutorial

How to use NodeDR POS: a step-by-step guide

Follow the setup once, then use the same simple flow each day: add stock, scan items at checkout, take payment, and review your sales. Each step below includes the screen and actions to look for.

Step 1

Install NodeDR POS and open it

Choose the install option that matches the machine you will use as the shop till. The Microsoft Store app is for Windows. CasaOS and ZimaOS users can import the CasaOS app manifest. Docker hosts can copy the one-command installer from the home page.

  1. Open the app after installation. On the computer running the app, visit http://localhost:1994.
  2. To use another till, tablet, or phone on the same network, open http://<shop-computer-ip>:1994 in its browser.

Tip: For Docker, Docker Compose must be available on the host. The one-command quick start on the home page helps install the required tools on supported systems.
Step 2

Create your shop account and settings

The first launch opens a three-step setup wizard. Create your administrator login, add the shop details that should appear on bills, then finish setup to open the dashboard.

  1. Step 1: enter your name, email, and password for the shop administrator. Save the password somewhere safe; it is stored on this machine.
  2. Step 2: enter the shop name and address, choose your currency, and set a low-stock alert threshold. Turn on tax or loyalty options if your shop uses them.
  3. Step 3: choose Go to Dashboard. The dashboard starts empty and shows sales, low stock, orders, and customer dues as you use the app.
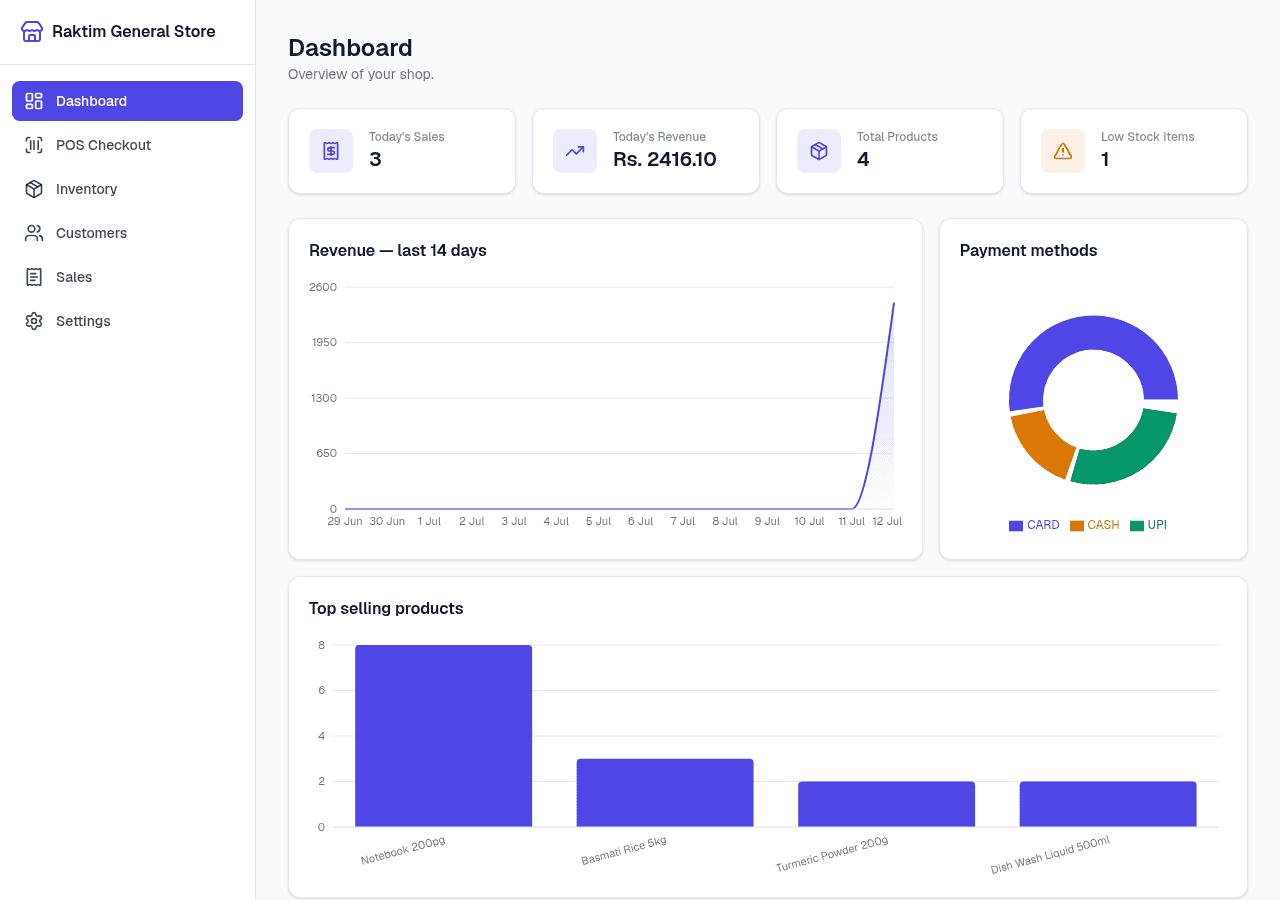
NodeDR POS dashboard with today's revenue, sales trend, low stock, and online orders
The dashboard brings daily sales and stock alerts together.

Step 3

Add products to inventory

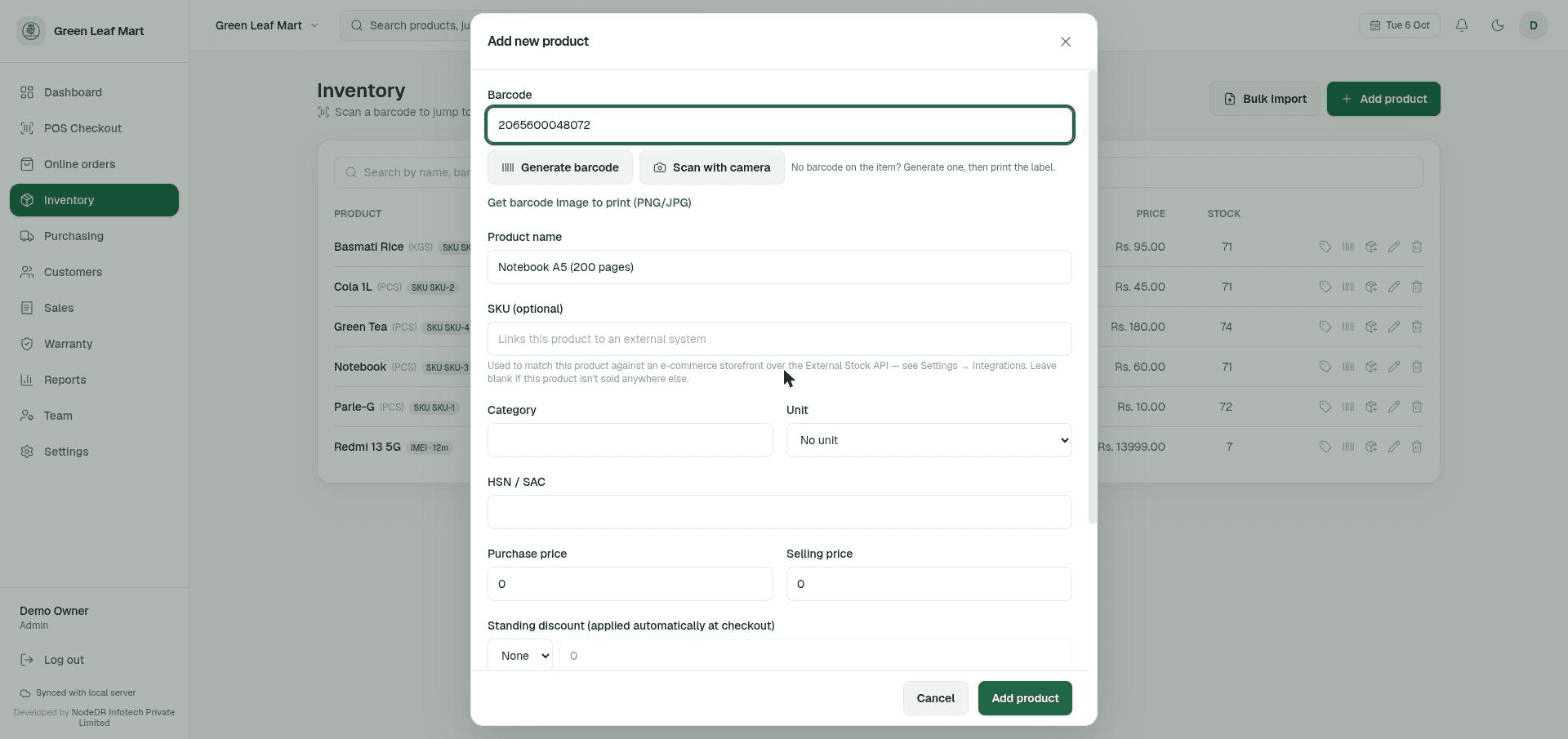
Add products before opening checkout. Each product stores its name, category, selling price, stock quantity, and optional barcode and SKU.

  1. Open Inventory and choose Add product.
  2. If the item has a barcode, scan it or type it in. If not, choose Generate barcode; you can print the label later.
  3. Enter the product name, optional SKU and category, purchase and selling prices, stock quantity, and the reorder alert level.
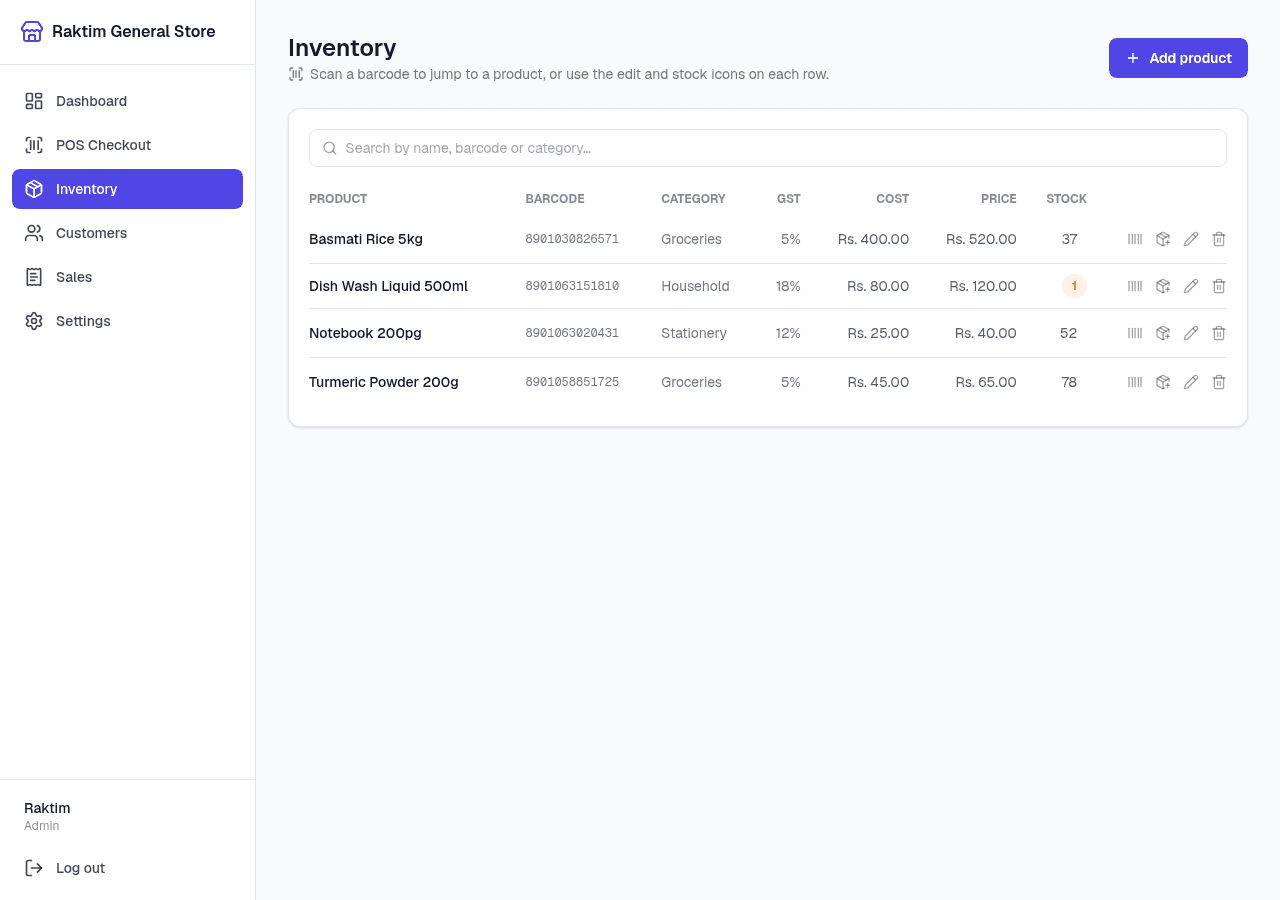
  4. Choose Add product. Confirm the new row shows the correct barcode, price, and stock. Use Bulk import for a larger product list.

Tip: A USB barcode scanner that types the code like a keyboard works at checkout. You can also use the camera scanner on a supported phone or tablet.

NodeDR POS inventory list showing products, stock quantities, and inventory actions
Use the inventory list to check quantities and manage products.
NodeDR POS add product form with barcode scanning and barcode generation options
Add a product manually, scan a barcode, or generate a label.

Step 4

Make a sale at POS Checkout

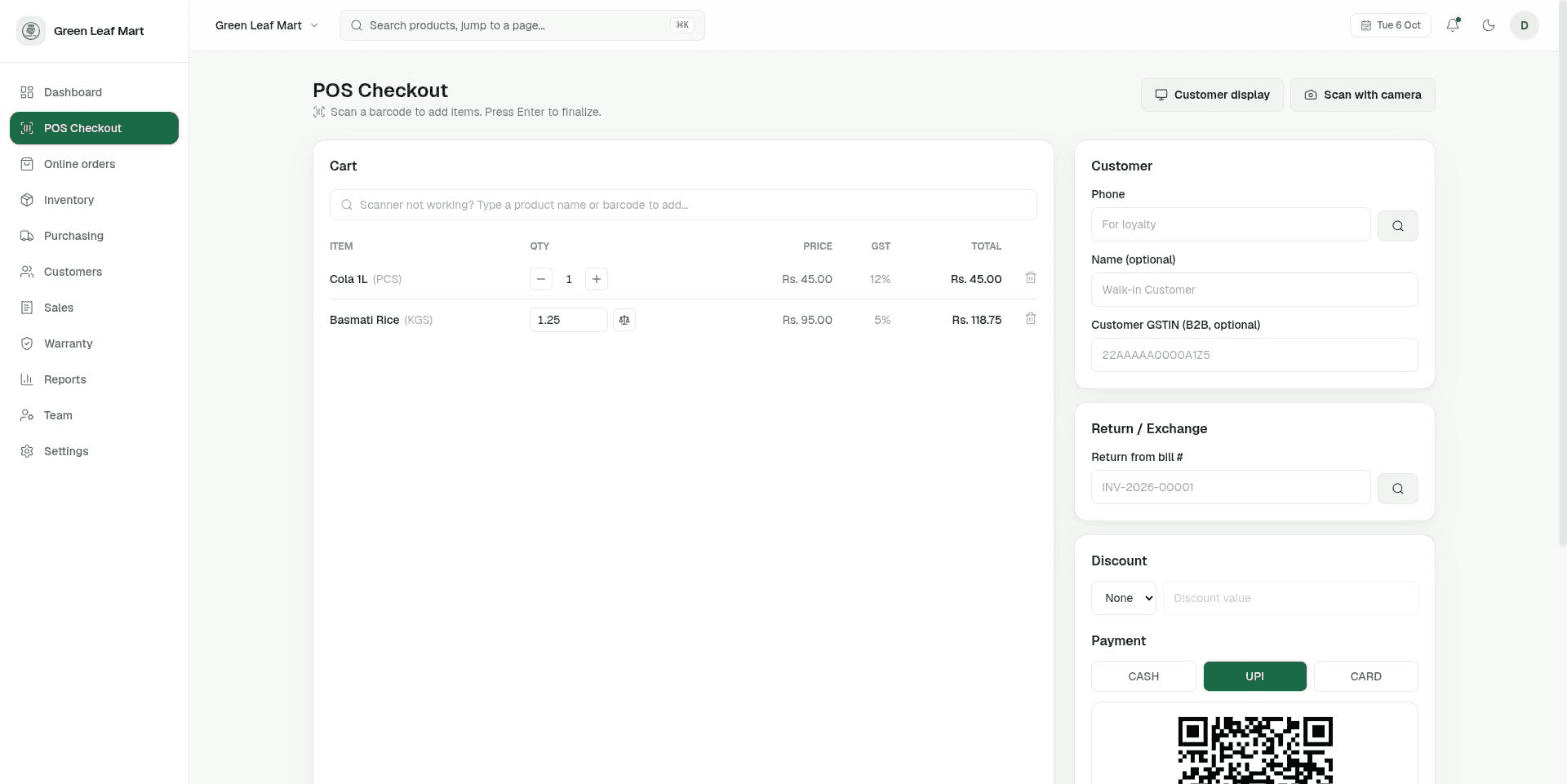
POS Checkout is the counter workflow. Add items to the cart, choose a payment method, and finalize the bill. You can use a USB scanner or type a product name in the search box.

  1. Open POS Checkout. Scan a barcode or type a name in the product search field, then select the matching product. Scan again or use + to add more units.
  2. Check the cart quantity and total. Add a customer or discount if needed.
  3. Choose CASH, UPI, or CARD. For cash, enter the amount received or choose Paid in full; the app calculates change when needed.
  4. Choose Finalize Sale. The confirmation shows the invoice number and offers Print, Download PDF, Print via USB, WhatsApp, and A4 Invoice.
NodeDR POS checkout with a product cart, weighed item, and UPI payment QR
Scan products, review the cart, and collect payment from one screen.

Step 5

Review reports and online orders

Use Reports to understand how the shop is doing. If you have connected an online store, the order board helps staff move orders through fulfilment.

  1. Open Sales to search past invoices. Select an invoice to view its items or reprint it.
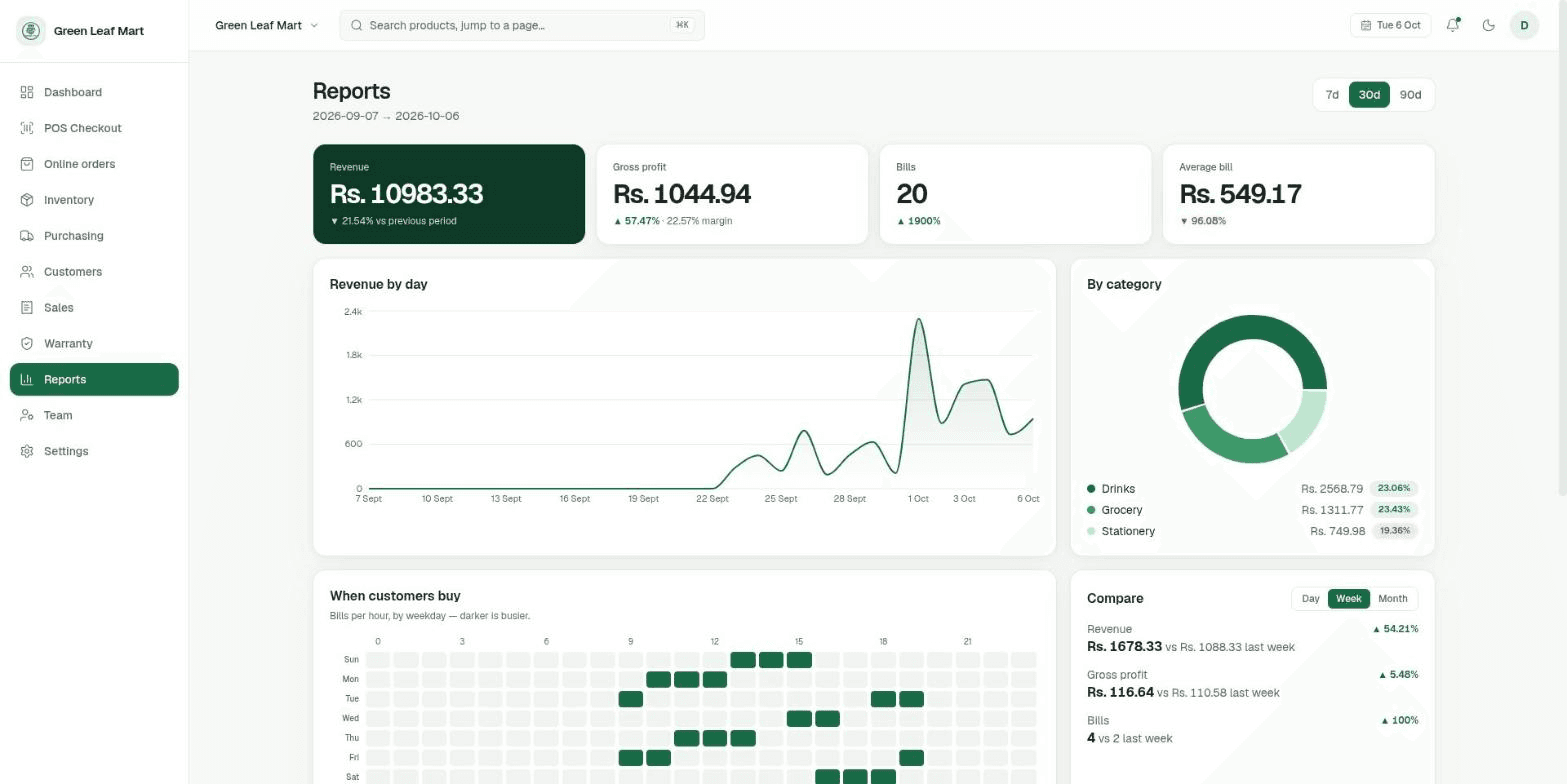
  2. Open Reports and choose 7d, 30d, or 90d to review revenue, gross profit, bills, average bill, category sales, and busy hours.
  3. Use the tax export links when needed, and export sales history as CSV from the dashboard for spreadsheet review.
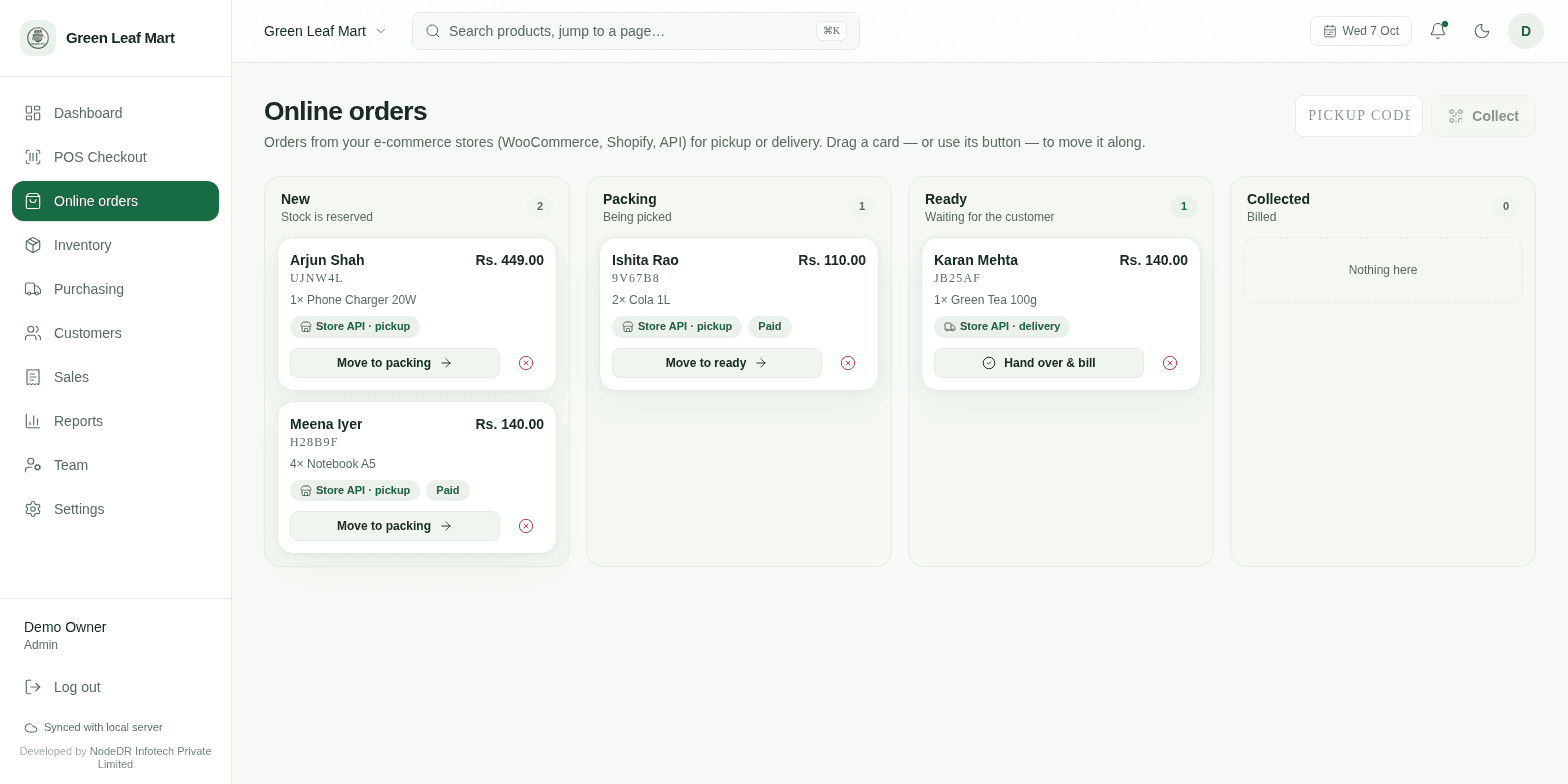
  4. For connected online ordering, open Online Orders and move each order through New, Packing, Ready, and Collected as work progresses.
NodeDR POS reports showing revenue, margin, category breakdown, and hourly sales trends
Reports summarize revenue, margin, category sales, and busy hours.
NodeDR POS online order board with New, Packing, Ready, and Collected columns
The order board tracks fulfilment when online ordering is connected.

Step 6

Print invoices and look up warranties

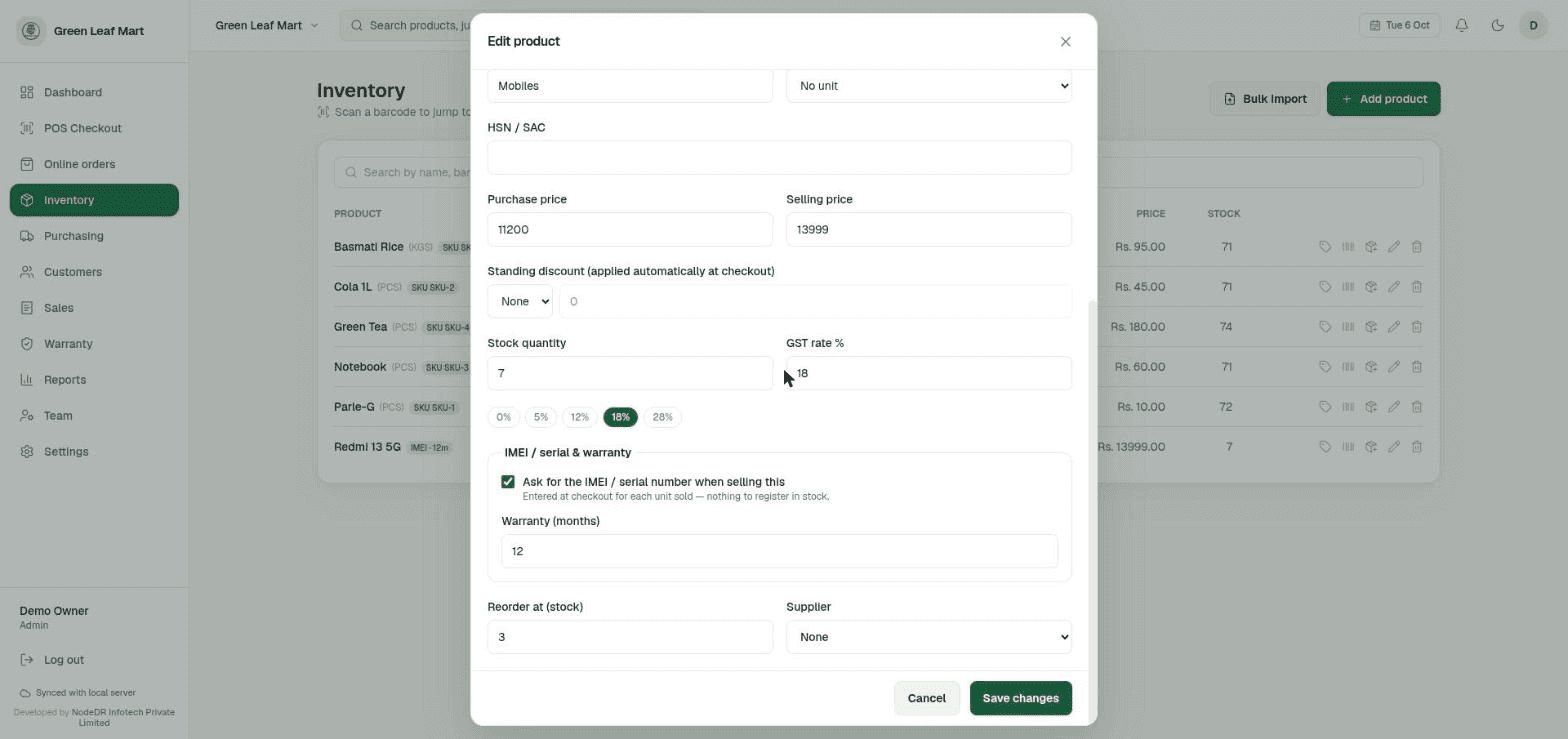
Use invoice settings for larger customer documents. For products that need serial or IMEI tracking, turn tracking on for those products and record the identifier during checkout.

  1. Open Settings and configure the invoice layout and shop signature.
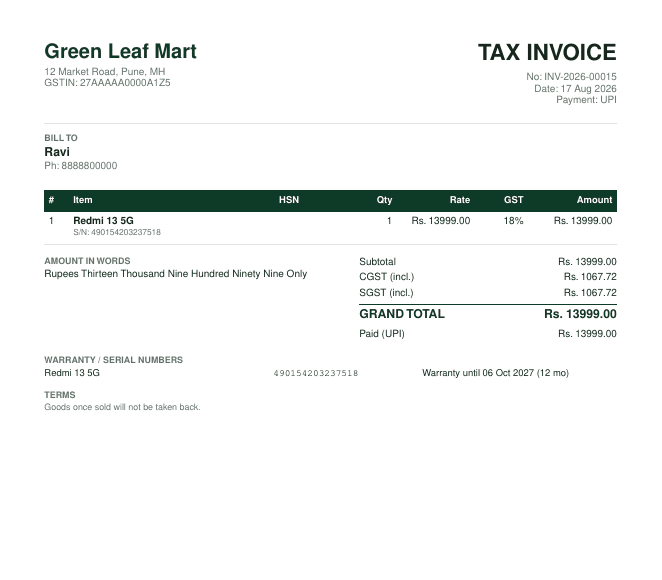
  2. From a sale, print a receipt or create an A4 invoice with the shop and tax details.
  3. When a tracked item is sold, enter its serial number or IMEI when checkout asks for it.
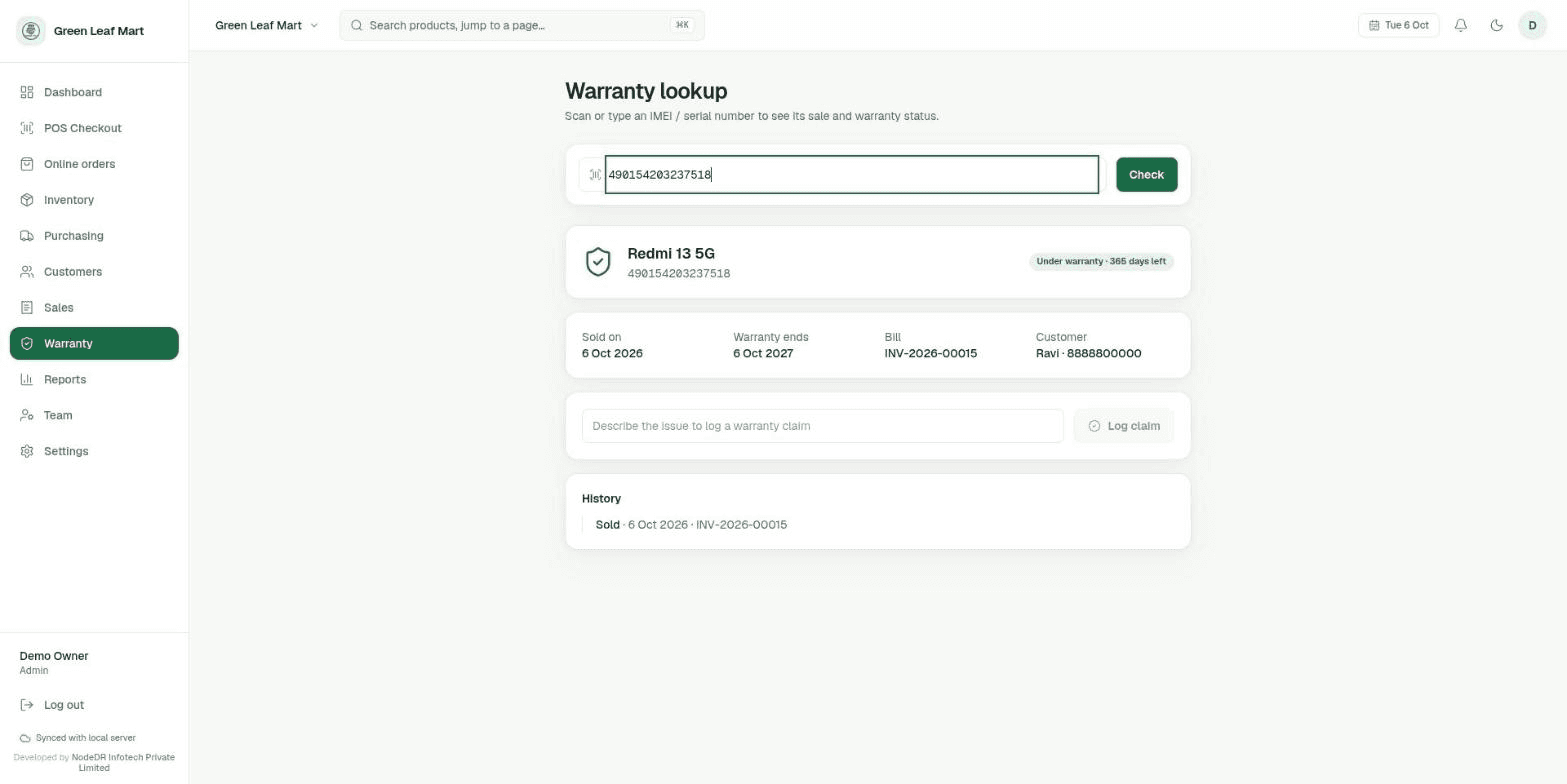
  4. Later, open Warranty and scan or enter that identifier to find the sale date and warranty status.
NodeDR POS A4 tax invoice with tax breakdown, warranty table, and shop signature
A4 invoices include the configured shop details and tax breakdown.
NodeDR POS product settings for enabling optional serial number or IMEI tracking
Enable identifier tracking only for products that need it.
NodeDR POS warranty lookup showing a product sale date and warranty status
Look up the original sale and remaining warranty by identifier.

Step 7

Keep your shop data safe and up to date

Your sales and inventory are stored with the app on your machine. Include the app data in your regular backups, and keep the app current so you receive fixes and improvements.

  1. For Docker Compose, back up the nodedr-pos_data volume. CasaOS stores app data under its NodeDR POS AppData directory.
  2. Use Settings → Updates when an update is available, or follow the update instructions for your install method.
  3. Before moving the app to another machine, make a backup and follow the restore steps in the project documentation.

Tip: Stopping or replacing containers is different from deleting the persistent data volume. Keep a separate backup before making storage changes.

Ready to open your shop?

Return to the home page to copy the one-command installer, or choose the CasaOS and Microsoft Store options.

See install options